
Installing a Net outside is a tricky process. It might seem obvious, yet it requires some special steps and measures to get the job done in a reliable way …
In this article I breakdown step-by-step the process to install a volleyball Net outside.
Hopefully this will help!
8 Steps to Install a Volleyball Net Outside …
We will now take a look at how you can install a volleyball net outside from scratch, that is with the installation of poles and all other segments of the net, on a court that has floor plates intended for assembling a volleyball net.
In case you are looking for a Net, then I recommend this outside quality multi-purpose volley Net. You can apply these steps on it …
Step 1
Find the holes plates and remove them with an Allen wrench. Most volleyball poles are secured to the ground through floor plates.
When you find the floor plate, you will have to insert the Allen wrench in the hole and twist until you pry the plate loose.
Allen wrenches are sold in most sports shops, and are easy to find.
By the way, if you find difficulties to deal with volleyball net weight, then I would advise you to have a look at these elements that actually make volleyball net heavier!
Step 2
Place the poles into the ground/into the holes. You will have to pick up the pole and hold it upright as you are sticking it into the ground.
When you have put the pole into the ground correctly it should make a clicking sound, meaning that it is firmly in place. It should stand upright with no help after it clicks.
If one of the poles does not click this means that the hole is dirty or blocked. Remove the pole and clean the hole, removing any debris or obstructions along the way.
Step 3
Adjust the volleyball poles at the required height. You can do this by twisting the poles at the bottom of the feet. If the volleyball poles do not have adjusters then you can always add volleyball spacers at the bottom.
Here are the adjustments that you will have to make depending on what you want to play.
- Co-ed, or mens volleyball – 2.41 meters or 7 ft 11 inches.
- Womens volleyball – 2.23 meters or 7 ft 4 inches
- Sitting or disabled volleyball – 1.5 meters or 4 ft 11 inches
- Senior volleyball – 2.1 meters or 7 ft 2 inches
- Childrens volleyball – 1.98 meters or 2.23 meters, that is, 6 ft 6 inches or 7 ft 4 inches
Step 4
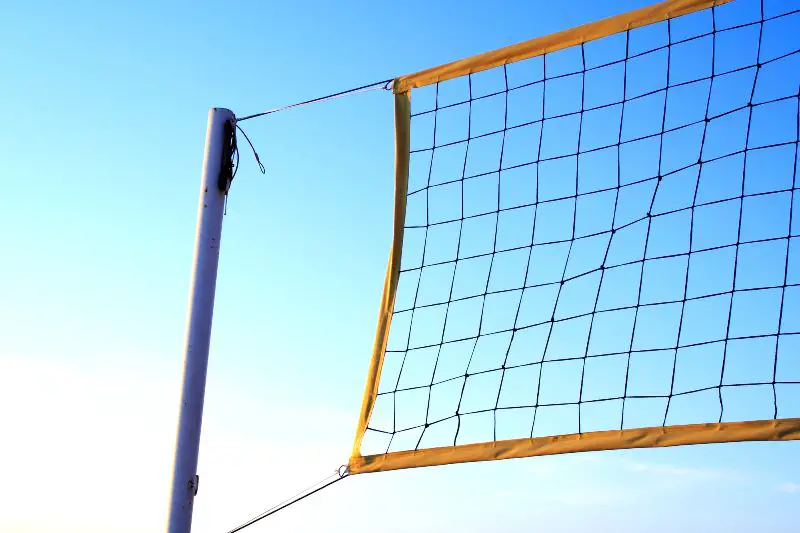
Attach the net rope to both poles. On the lower half of each pole you will find two hooks, one on the upper side and one on the lower side. Tie each side of the rope of the net to the hook in a knot.
After that thread the rope through the winch leader strap. It with a metal connector that hangs on the volleyball poles side.
Step 5
Tighten the winch to secure the net. Grab the winch and turn it until the center of the net reaches the desired height. The winch looks like a handle jutting out of the side of the poles side.
If you are unable to reach the desired height, try turning the winch more or adjust the poles further. It can get stressful sometimes, but it is worth it in the end.
Step 6
Attach and tighten the net straps. The volleyball net should have 2 additional net straps for each side. Grab the net straps and secure them to the hooks that should be located near the hook that you attached the rope to.
The straps should be horizontal and parallel to the ground.
Step 7
Tie the ropes off to the end posts. If there are remains of the ropes or straps, loop them over the poles and ropes, and tie them in place.
This should prevent tripping and injuries that might occur during gameplay. Hold the ropes in place with loose knots, in order to remove the ropes more easily after the game or practice.
Step 8
The last step is to attach the volleyball antennas to the net. The antennas are there to help you spot fouls more easily.
Volleyball antennas are there to mark the out-of-bounds lines and help the observers and the referees call fouls more easily.
The antenna needs to be positioned over the nets top and secured in place with a clip or another object, depending on the manufacturer. Antennas are not necessary to play with, but they keep the game more fair and are a good indicator of the gameplay itself.
Those were the steps that are needed to be followed in order for you to set up an antenna outside on a court that is intended for the playing of volleyball.
Best ground conditions to hang a volleyball Net
Some people/players will occasionally try setting up the net in different places like the grass, or sand.
When setting up the net in the outside you will have to be careful what ground you choose.
For example, muddy ground is not advised because the poles will not be stable when you put them in the ground. Mud is a loose type of ground, it is formed when the dirt absorbs too much water.
As such, mud can destabilize the poles, because it makes it easier for them to move around.
Same goes for the soil that has much stone in it. The soil that has stones scattered all around will make it virtually impossible to stick the poles in the ground, let alone make them stable enough for playing.
This is because such soil usually has the first few centimeters covered in dirt, and grass, and the rest is dirt mixed up with stones.
The best ground type for volleyball poles is solid dirt. It will provide you with enough stability for the poles than mud or dirt will ever do.
Adjustments for Installing the Net in the Sand
Poles for beach volleyball, unlike poles for regular volleyball have a different setup. By this I mean that poles for beach volleyball are usually there in the sand, just waiting for someone to set up the net and start playing.
However, the setup mechanism is different. The poles for beach volleyball are usually square shaped, and much wider than those for regular volleyball. Instead of hooks, they have small rings on the top and at the middle, or a little bit below the middle.
The rope that is at the top of the net will go through the top ring. After pulling the loose end through the top ring you will have to tie a knot, known as the impromptu pulley at the middle of the rope. Make sure to tighten the rope.
After tying the pulley, take the other end of the rope and push it through the bottom ring, and then, pull the end through the pulley you made earlier, now you should have leverage and be able to pull the net to the height you like.
It is worth noting that you will tie the bottom end of the net to the bottom ring at the very beginning of the net setup procedure.
If you are excited about this topic, then you probably should also learn about building a volleyball sand court! I think you will find that really interesting …
Adjustments for setting up the Net in Grass
Setting a net up in grass is different than setting up the net in the sand or at a pre-prepared court.
You should first measure the distance between the poles. The distance should be somewhere close to 18 meters.
After measuring the distance, mark the spots where you want to place the poles, then unroll your net to its fullest extent.
Then put the poles in the opening on the net that is intended for the poles.
Make sure that you have adjusted the setting to fit your desired height. There should be a button or a switch that will allow you to adjust the pole.
The height of the pole depends on the type of volleyball you want to play. We have already mentioned the required heights for each volleyball game type.
How to properly remove the Net when you’re done?
In order to disassemble the net, you will basically need to go backwards through the steps when you were assembling it.
First take the stakes that hold the guidelines and the net in place. Remove the guidelines from the net, untying the knot that you tied earlier.
Secondly put the poles back in their first position. That is find the button or the switch, releasing the pole, and getting it back into position.
Next, pull out the poles from each side of the net. you can disassemble the poles after you get them out of the net.
Next, roll up the net and put all the parts away in a bag or whatever the manufacturer intended for the net to be stored in.
Final Thoughts …
If it is the first time assembling and installing a volleyball net, then I highly recommend to have somebody else to help you out. Don’t do it yourself, until you’ve already gone through the process couple times before …
Also, keep in mind that some parts of the Net could be a little heavy and you might need some help.
Finally, I highly invite you to check these tips to store a volleyball net! You will find it really interesting …